This just Helped me a Lot Restoring back Boot Problem on Asus X502c Notebook.
Restoring UEFI boot entry via motherboard replacement or BIOS update
In this article we will show you how you can recover the UEFI boot entry following a motherboard swap or a BIOS update and what settings must be used to ensure that the motherboard and the boot entry are stored.
There is often a problem with Windows not starting in the UEFI mode if the BIOS is updated or if the motherboard has been replaced, because the motherboard will not boot any more UEFI entries.
Contents
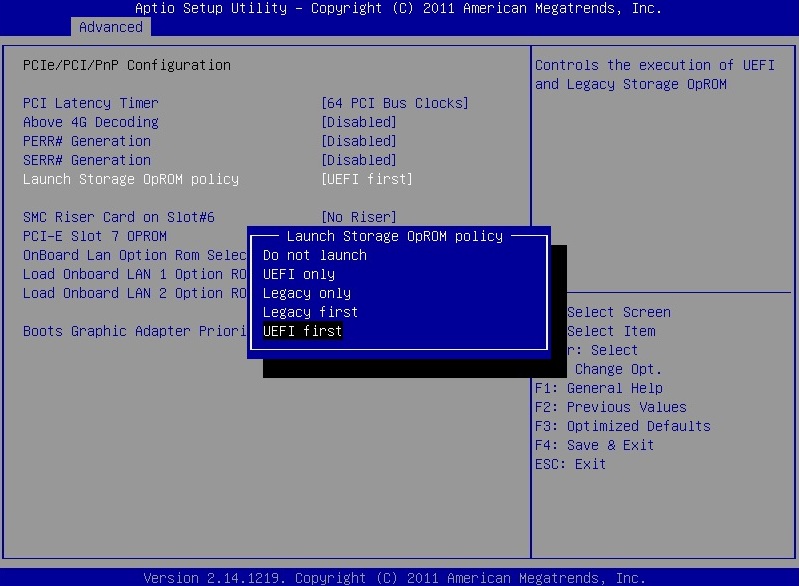
[hide]Set-up Launch Storage opROM policy on UEFI first
You can change an option to increase the chances that the motherboard finds the UEFI boot entry again.
In the following screenshot, you can see which setting is required:
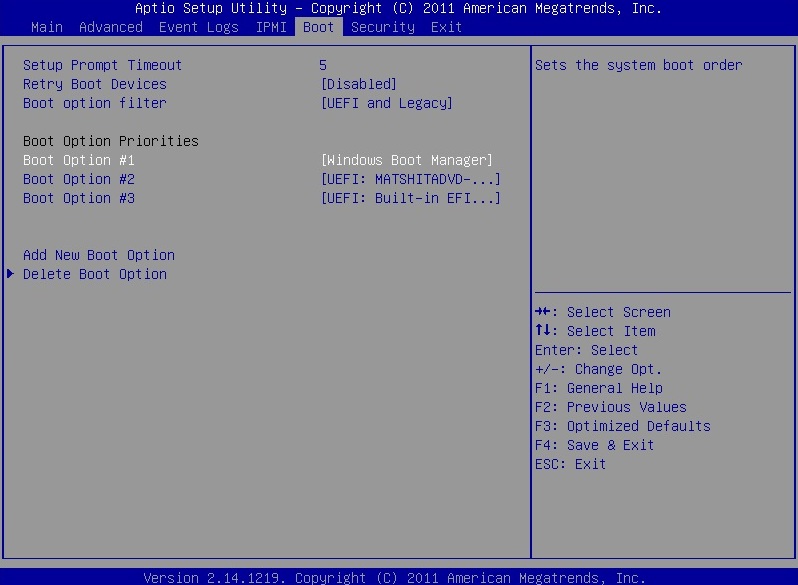
Check that the UEFI Boot Entry is available again
After you have set the BIOS opROM policy to UEFI first and restarted the server, you can use the BIOS to check whether the boot entry is available again.
In the BIOS the UEFI Boot Entry for Windows is called: Windows Boot Manager.
In the following screenshot, you can see where the Boot Entry in located:
Entering the UEFI Boot Entry manually in BIOS
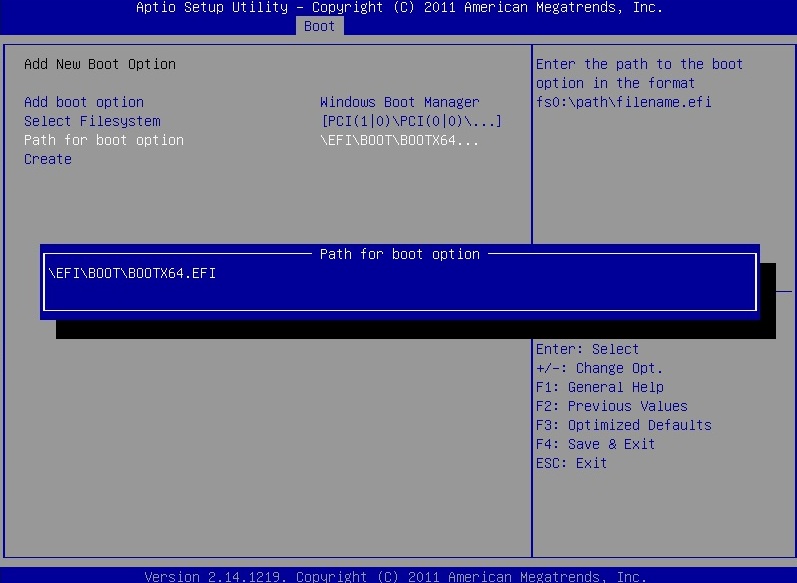
If the boot entry is still not available, you can manually enter it in BIOS.
To do this go to the Boot tab and then click on Add New Boot Option.
- Under Add Boot Option you can specify the name of the UEFI boot entry.
- Select File System is automatically detected and registered by the BIOS.
- Path for Boot Option is the path for the file BOOTX64.EFI that is responsible for the UEFI boot. The following command should be entered here:\EFI\BOOT\BOOTX64.EFI
Windows should now start properly without any problems after you restart.


0 comments:
Post a Comment